Jeep Cherokee Modifications
 (as of
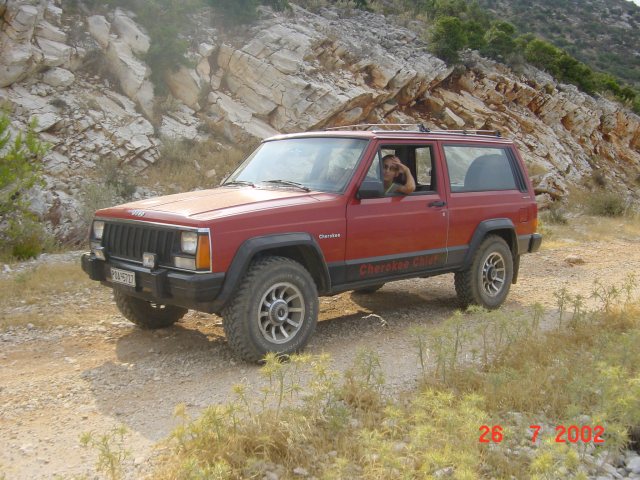
The Cherokee was bought as a base, for a capable off-roader. This was in my mind, since the day I paid the down-payment, so I knew that there was a long (and expensive) path ahead, full of modifying, upgrading, improving. In the paragraphs below, you can read what things were changed in the truck, what was modified, what was improved.
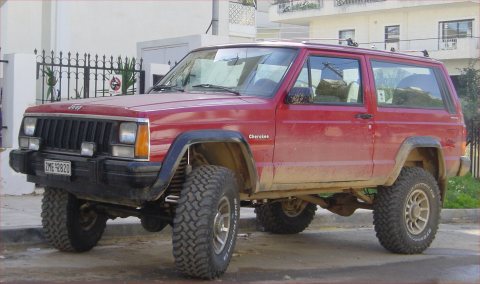
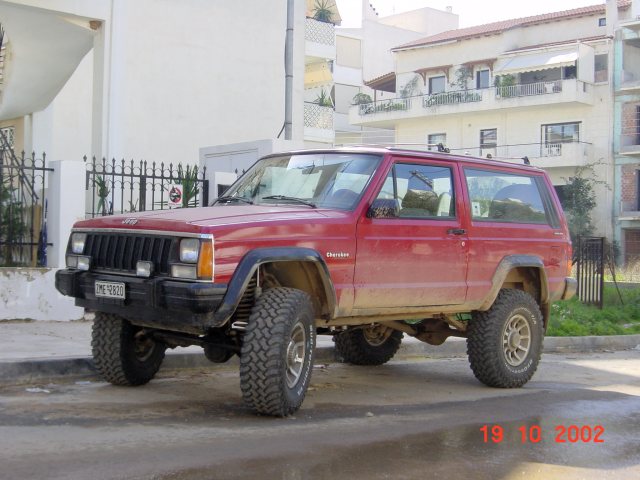
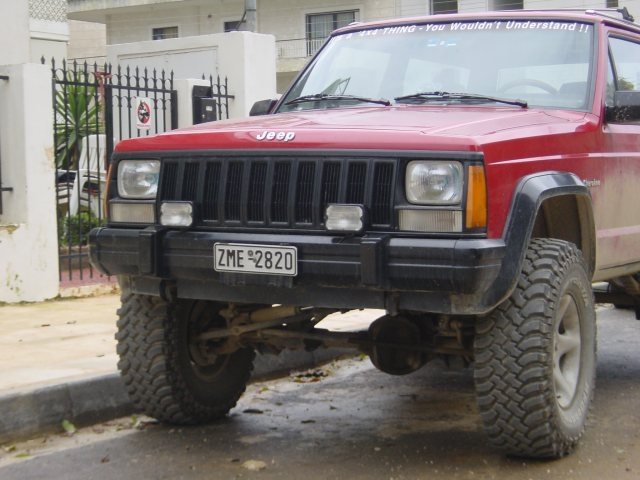
The picture on the right, shows our XJ soon after we got it. Needless to say it didn't remain like that for long, but for details check below.
This web page is never complete. It will evolve together with the truck and with my experiences.
Dated list of modifications performed:
July 2002
As soon as we got the truck, I had it taken to the service station, for a check up and basic maintenance. All fluids were changed (differential, gear box, transfer case, engine). New spark plugs and air filter were installed. New front brake pads were installed.
August 2002
Paint job
The Cherokee received a new paint job. It was painted with "Ferrari Red" color, so at least now it looks decent!
The happy owner with the freshly painted Cherokee.
Electrical
A JVC Radio-CD Player and a car alarm were added.
September 2002
Electrical
The pathetic horn that the car had, was changed with a twin setup of FIAM horns. At least now I can warn the cats to get away, when they sleep under the truck.
A new light control switch was installed, in order to provide the flashing capability to the XJ's headlights.
The car's fog light were wired to work only with the main beam on. I just cut their 12+V supply from the main lamp switch and connected it to a spare position in the fuse box. Now they are completely independent from the main lights. At the same time, I noticed that the fog lights had a silly shield in front of the lamps, which was severely reducing their lighting output. This is a very thin metallic part, which was easily removed with a pair of needle nose pliers. Now the fog lights are bright and useful.
October 2002
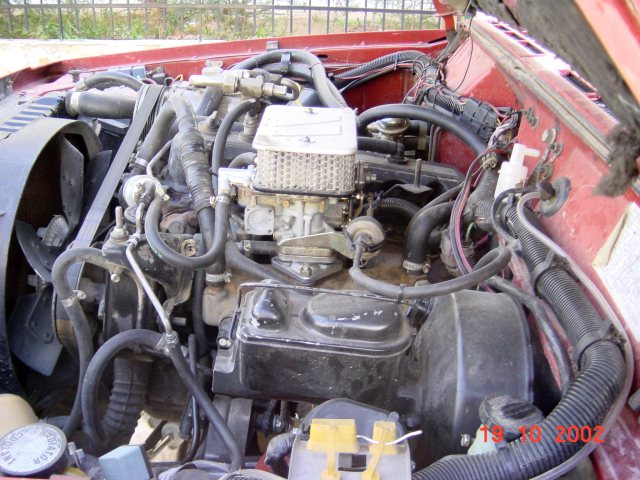
Carburetor
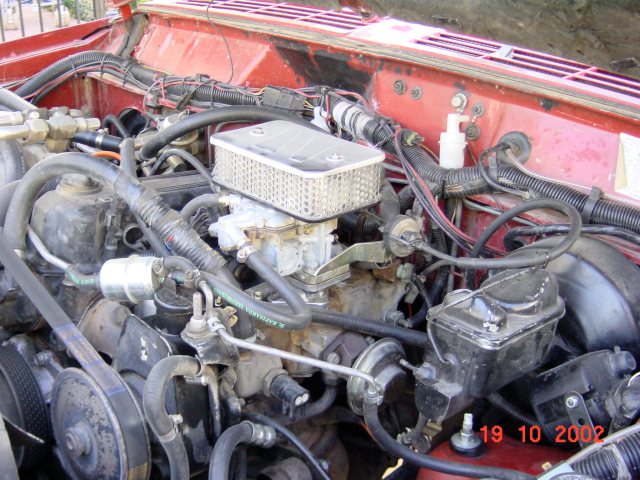
The old Holley carburetor which was on the engine, was changed with a brand new Weber dual-barrel carburetor kit (Part number K552). What a great modification! Everything was included in the kit, and it went so smoothly.
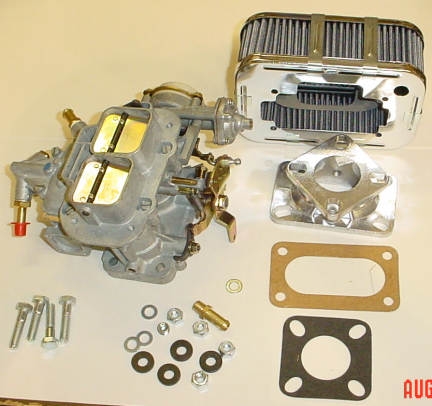
The results are amazing. The car feels like it got a new engine. At the same time, all the stupid vacuum-controlled devices that Jeep had installed on that year's truck, in an effort to reduce pollution were removed (back then, they didn't have the engine management systems they have today, or the injection etc.). A whole mess of vacuum tubes and electropneumatic valves was thrown away, and a beautiful, 4-cylinder engine was reveiled underneath. Old-fashioned, understandable technology. One thing I need to figure out, is if the Sol-Vac solenoid, as it is called, is used by the air condition, to raise the engine's RPM. If it is, I need to find a way to install it, so that it works with the new carb. That's goind to be some hell of a custom job. As a final touch, a set of new spark plug wires was installed. I didn't had the chance to snap any pictures during this upgrade, but if you want to read an excellent article on a Weber installation, click here. A new window will open, close it to return here. I'll add a couple of pictures here, in the next few days. The Weber kit and the spark plug wires were purchased from Rusty's Off-Road Products.
Ignition
After the Weber installation, I discovered that the vacuum on the distributor acted wierdly. It looks as if it is providing vacuum advance at slow acceleration, but not under full throtlle, when accelerating hard. As a result, there is a slight, but noticeable hesitation until the engine picks up. My engineer thinks that maybe the vacuum device has a small hole, which does not affect its operation in partial throttle, but under hard acceleration it opens and affects the advance. A new distributor has been ordered (part No 3242700) was installed without much thrill. My next problem is that we do not have any idea what the spark advance should be on this engine. We initially adjusted it at around 10 degrees, but the engine felt (better than before the Weber, but still) dear. After some experimentation, it is now set at 17 degrees (with the vacuum connected) and it looks as if that has almost solved the problem of the hard acceleration hickup, but not completely. Since the car is not suffering from any detonation, I guess we could take it up one more degree and see if that will help.
Since all the pollution control devices are removed from the engine, I thought I would give a try to an ignition modification I've spotted on the net. Check the drawings below or click on them for further details:

|
|
| The factory configuration | John Nutter's ignition modification bypasses the computer altogether, making it essentially a pre-1983 installation. |
The modification works and what it does, is that it takes the car's computer out of the ignition circuit. Since the computer no longer controls the fuel system, there is no need to control the ignition one. With this mod done, the engine works just fine and I do not have to worry about the computer sending stupid instructions to my ignition.
These drawings were found at a very interesting site, called Jeep Adventures under the Hood. It has a great explanation of what all those stupid vacuum devices are.
Radiator
The old single-row radiator has been changed to a custom, three-row one. The day it was installed (September 30th, 2002) the needle in the temperature gauge, didn't move from the left-most position. Admitedly, the car is running without a thermostat, the previous owner prefered a clogged radiator and no thermostat, to a new radiator and the thermostat. Don't ask me why, people's mind work in mysterious ways. A new thermostat will be added, as soon as possible, but this thick 3-row cooler should make the engine run cool and happy even under the most adverse conditions.
Lift
Of course, ever since I got my hands on this Jeep, I could not stop dreaming about lifting it. After some serious investigation, a 4.5" lift kit was ordered from Rusty's Off-Road Products. The kit just arrived last Monday and is scheduled for installation this Monday (October 14th, 2002). The reason I selected Rundy's kit, is because it was the most complete one. The kit came with:
- Front Coils
- Rear springs (complete, not add-a-leaf)
- Shocks
- Transfer case drop down kit
- Front adjustable track bar
- Tubular lower control arms
- Brake line relocating brackets
In addition to the above, the following items were also ordered:
- A set of front tow hooks
- A new steering stabilizer (since I do not know when the existing one was changed)
- JKS Sway bar disconnects
- A set of stainless steel brake lines
- A Hi-Lift Jack
With the above installed, according to Rusty, I'll be able to use 32x11.5R15 tires without any fender trimming. I guess that with some minor trimming (from what I read on the net), I'll be able to run 33x12.5R15 Mud Terrains, without much trouble.
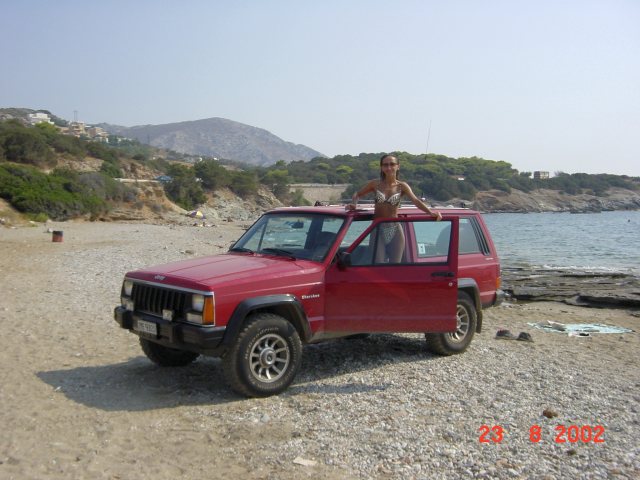
Here is what the car looked, before the lift kit being added, with the proud owner on it.
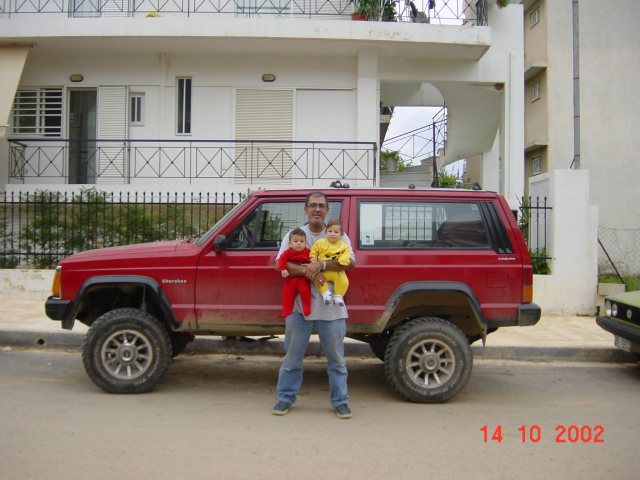
Well, the camera didn't get along during the lift installation, but below you can see three proud four-wheelers (the two are a bit young to drive yet, but they are getting ready for it), with the Cherokee with Rusty's 4.5" lift kit installed. Actually, with the kit installed, the Cherokee has gained close to 6" of lift, which is great. I do not know if and when the springs and coils will sag, but it is great as it is at the moment. It badly needs bigger tires though, if I could only convince the owner how badly it needs them!
And finally, here are some more pictures, with new tires. BF Goodrich Mud Terrain KM in 32x11.5R15! Doesn't it look great?

It sure gives the old truck a very nice approach angle.
And here it is, with its new wheels.

Oh, of course the rear sway bar was removed.
Problems with the lift
Even though I love the stance of my truck with the lift installed, there were several problems, which manifested themselves after the truck got lifted. Below, you can read about them:
First of all, the steering felt extremely vague and sloppy. Additionally a slight pull to the right could be felt, which could not be eliminated. Even though the front end was aligned properly with 6 degrees of caster and zero toe-in, the steering felt so bad, that I could not stand it. A new Grand Cherokee pitman arm was installed and this seems to correct the pulling (it must have been the beginning of bump steer) and some of the vagueness. New, adjustable upper arms were also ordered, which will allow me to have a wider range of caster adjustment. I am still not 100% satisfied with my steering, but it is much better than it initially was, after the lift was installed.
The second problem I have, is related to the rear springs. It looks as if Rusty's rear springs are too short or too stiff, or I do not know what. Since they were installed, they had the shackles positioned all the way forward, thus not allowing much downwards travel.
According to Rusty, the springs should sag a bit, thus moving the shackles to a more proper angle. After having them on the truck for more than two months, they haven't sag a bit (which is a good thing, since they provide almost 6" of lift as they are now), so Rusty send me a set of .75" longer, greasable shackles, to rectify the problem. I still haven't installed them yet, so I can't say anything else at the moment.
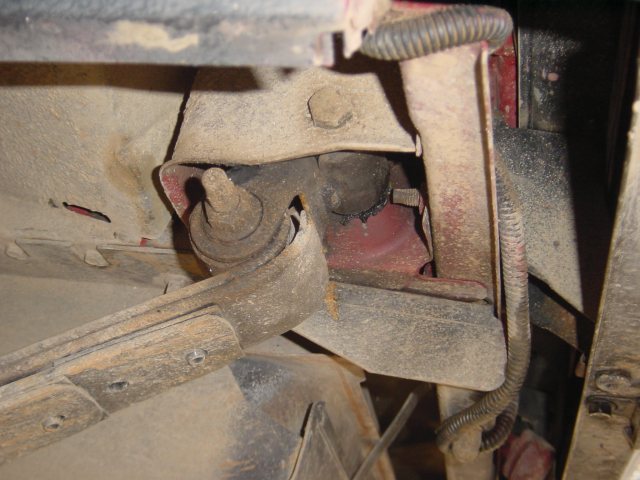
Another problem with the rear springs, is that they move inside their bushings, at the front mounting point. A couple of weeks after I installed the lift, I noticed that they had moved all the way to the right, within their mounts, touching the mount metal. I had the u-bolts loosened up, force the springs back to the center of their bushings and retighten everything, after driving the truck a little back and forth, in order to set things up properly (according to Rusty's instructions). The springs were back to the right side of the mount again, after a couple more weeks.
Rusty send me a set of new bushings, which again, I haven't got the chance to install yet. I'll let you know if these corrected the problem. In general, the quality of these springs leave a lot to be desired. They ride very hard, at least for my taste. I am not sure if Rubicon Express springs are softer, but these ones have my kidneys travel up to my throat, every time I hit a speed bump, even at 20 mph. I would have prefered softer springs.
Another thing I noticed, which I am not sure if it is a problem or not, is that Rusty's shocks are a bit loose, at the point where the upper axle enters the shock body. If you grab the shock body and move it around, you can see the axle moving. I do not think that this is good, but only time will tell. For the time being, Rusty send me a new rear shock, to replace the one which came with the kit, and which had a excessive play, the others were a bit better. Ideas for new shocks would be sincerely appreciated.
I got another problem, which I cannot directly attribute to the lift, it was more my mistake. The shop which installed the lift for me, told me that the parts would need to be tightened again, after 200 kilometers. Well, I did that, but I forgot to tighten the upper bolts of the shocks, so one day, one of these nuts (the driver's one) decided to part company. I heard a strange noise, as I was going on a turn, and I stopped to check it out. Of course, the nut, washer and rubber isolator were nowhere to be found. Since then, I installed two nuts on each of the shocks, just to be on the safe side.
Wheels and tires
After the lift, the tires were changed to a set of new BFGoodrich Mud-Terrains KM, in 32x11.5R15, on the aluminum 15x7 rims, with 4.5" of backspacing.
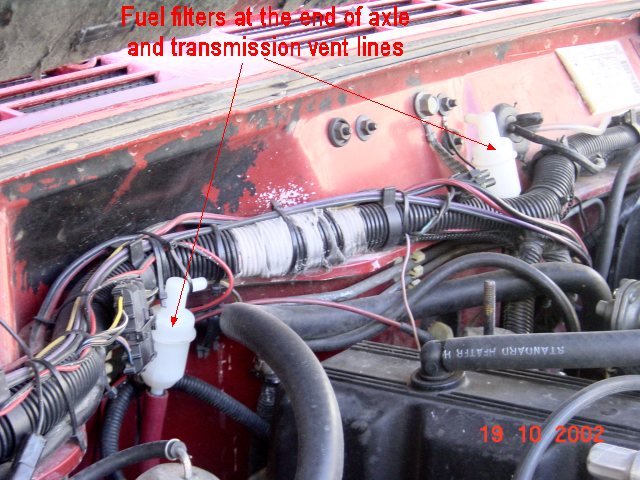
Ventilators
The front and rear axle ventilation hoses, were replaced with longer ones, which brought the ventilation up in the engine compartment. At their end, three cheapo fuel filters were used as vent valves.
November 2002
Brakes
A set of new handbrake cables was installed, since the old ones were in miserable state. I grabbed the opportunity to change the rear brake shoes at the same time.
Also, a set of stainless-steel-braded extended brake lines were installed, in place of the old OEM equipment. The brake fluid was of course changed.
Engine
An 190 degrees thermostat was added.
Electrical
Front headlights were changed to IPF and Magic J lamps. Huge improvement!
Tow hooks
A set of Rusty's Off-Road tow hooks was installed.
December 2002
Steering
A Grand Cherokee pitman arm was installed, which helped correct the steering arms angles, thus eliminating the slight bump steer that was manifesting itself as a slight pulling to the right.
Suspension
The upper control arms were changed with Rusty's adjustable ones, in order to allow more adjustability in the caster. Alignment is not yet done, I'll keep you updated about how it goes.
Electrical
Side marker rewiring
A small modification was done, so that the side markers act as turn signals as well. Look at these pictures below:

 As my XJ came from the factory, the side markers are just that, side markers. By applying this modification (which is a 10 minutes job), they also act as turn signals.
Before the mod, with headlight off and on.

 The mod is very simple, just cut one wire from the side marker and strip one wire from the turn signal. Connect the cut wire to the stripped one, add some solder and some electric tape at the connection and you are done. One of the easiest and most lovely mods!
After the mod, with headlights off and on.
This mod was seen in the MadXJ site.
Electric Windows
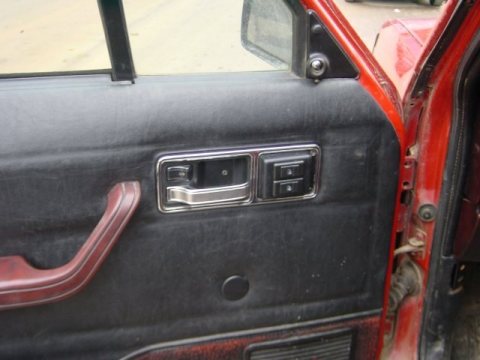 The XJ came with manual windows. Being used to the luxury of electric windows from my Ssang Yong/Daewoo Musso, I had to have that feature in the Cherokee. Leaning to the passenger side to open that window is not an easy task for someone with my level of fitness. So, I ordered a set of Electric Life XJ-specific electric windows kits (part number JE01-K), which were installed on Friday, December 27th 2002, a late Christmas gift for the Jeep. Installation was easy, once we figured out how to remove the stupid press-fitted studs that Chrysler uses to hold the manual mechanism (and other door hardware) in place. A punch and a hammer was all that it was needed, but until we figure that out, we used a special drill bit, trying to drill them out. Needless effort! The kit came with three switches, two for the driver's door, and one for the passenger's one. The supplied switch panels fit nicely on the door-handle panels of the truck, for a very factory-looking installation. The supplied switches though do not feel very strong, but I guess only time will tell how good they are.
Body Work
The chrome frame around the grille and the light bezells were painted black. I wish I could do the same with the roof racks!
February 2003
Electrics
Power Door Locks
A set of electric door locks was installed. Thank God, for those little features that make one's life easier! I haven't the faintest idea of the brand of those locks, most probably they are generic ones, but they work fine and were easy to install. I also took the opportunity to change the way the arm rest is attached to the door. The upper stud was in such a bad condition, that I had to re-thread it and add a nut on the back. It makes disassemblying the door a bit more difficult, but at least the arm rest is held securely in place.
March 2003
Body work
Front fenders cut
 Even though I haven't had the chance to try the articulation with the lift and new tires, I decided to cut off the front fenders, just to make the truck show better. It took me about 2 hours and four Dremel heavy duty disks to cut off the pieces behing the bumber and reattach the flares.
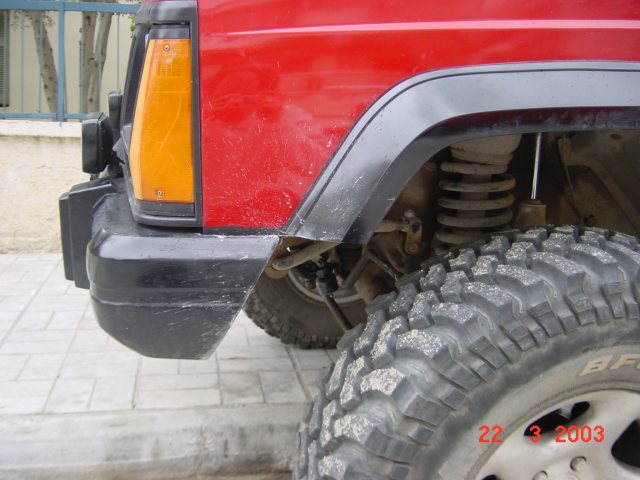
 After a few days from the above "operation", I got the chance to really flex the XJ on a hill near my house. The wheels staffed very well under the fenders, but the front edge of the fender need to be cut more, since the tire rubs both on the flare and on the fender. The flares were cut, as shown in the picture at left, but I didn't cut the fenders yet, as for that, I'll also need to drill a couple of new holes for the last two screws at the front of the flares. Oh well, I know, Bushwackers are the answer, but I am kind of short on cash right now.
Suspension
Rear springs recentered
It took me about two hours fighting with a crow bar, but I managed to recenter the rear springs in their mounts. I do not think this is a permanent solution, I guess I'll eventually have to install the new bushings that Rusty had send me, to solve this problem.
Rear springs altered etc.
I finally got the time to do some work on my rear suspension. As you might have read before, the rear springs were way too stiff for my taste, they moved around in their front bushings and the shackles were almost out of upward travel, since the almost touched the front of their mounting holes. Rusty was kind enough to send me some new bushings and a set of shackles which were 0.75" longer than the standard. I visited a springs shop today and had those items installed.

At the same time, I had the lower (shorter) leaf removed from the leaf pack, in order to soften up the springs a bit and also not to lift the rear of the truck that much. Net result? Almost the same height at the rear, as before the changes (maybe I lost .5 cm), shackles now are almost vertical and the suspension (I think) is quite softer. I am pretty satisfied with these changes. The only problem was that the exhaust was touching the shackle, but a short visit to an exhaust shop, solved the problem in 5 minutes. They warmed up the end of the exhaust with an acetylene torch and bent it slightly downwards and inwards. Nice!
I also took some time to do a little work in the front suspension. If you look under your XJ, right below the mounts for the Upper Control Arms, you will notice some metallic things, which were just right, for limiting the downward travel of these arms and for cutting the boot they have there (they are Rusty's adjustables). With the help of a pair of vise pliers (and a lot of cursing), I managed to bend them down enough, to free up the UCAs travel. I do not know what role those stupid things played, so I didn't dare just trimming them off, although I think that some reinforcement at that area might do some good. I was also thinking of trimming the shock absorber base, in order to gain some more clearence for the lower control arms, however, my control arms are bent in their one end and it looks as if this mount will not be a limiting factor. We'll see.
I also replaced the UCAs bolts and nuts. When I had them installed, the mechanic managed to damage at least two of the bolts, so he replaced them with others he found in his junk pile. Since I was not sure of the strength of the bolts he used, I had a new set installed. The new bolts came with torx heads. It looks as if DC wants us all, to get new tools, so I purchased a set of torx bits for my toolbox.
Electrical
Alternator replaced
While I was investigating a problem with my electric choke, it was discovered that my alternator was not charging under load. Some noise could also be heard from the alternator, and in the morning, the voltage was near 12 V. only and it was really warm to touch. A new alternator was therefore ordered and installed. It took me and my older son about 2 hours to do it, but everything went smoothly and now I have 13.8 V. when the car is started. It remains to be seen if the alternator problem was the culprit for the poor idle, when cold.
Update
 It looks as if it was indeed the alternator which was causing the idle problem when cold. To be on the safe side, I also replaced the Choke Heater Relay.
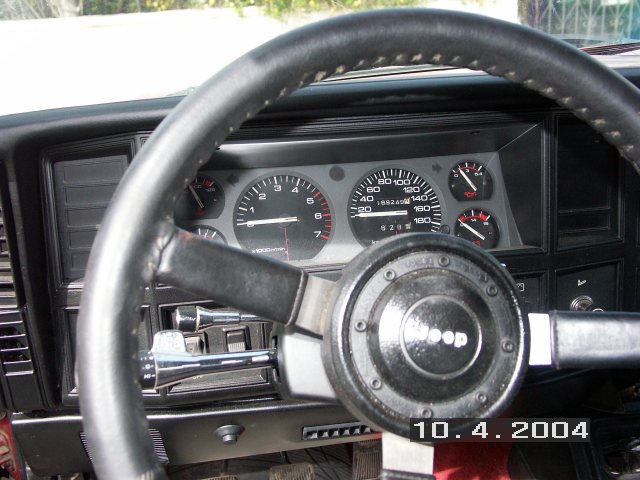
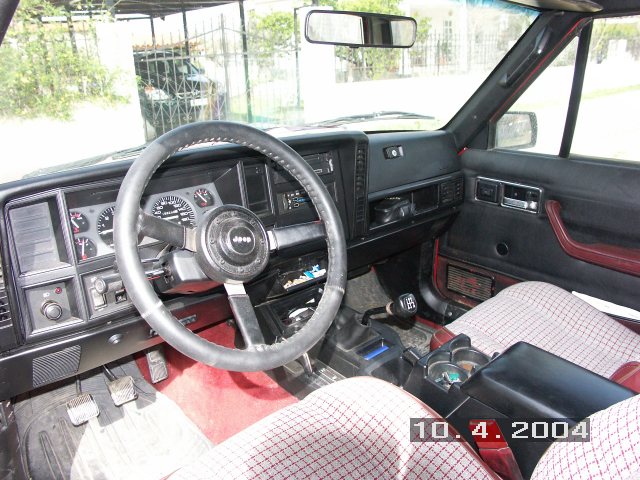
Internals
Leather steering wheel cover installed
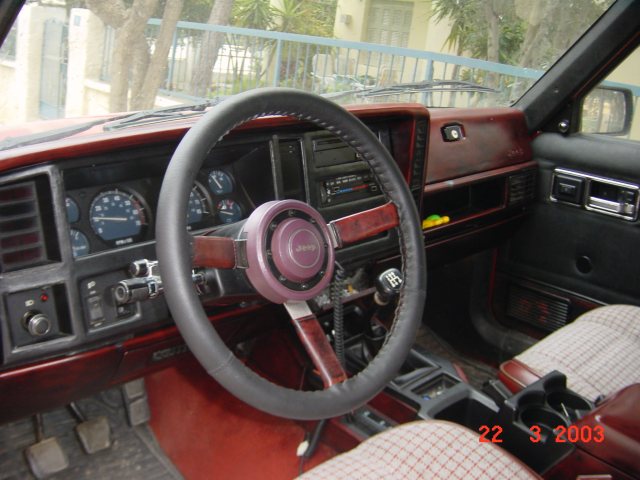 My steering wheel has seen better days. I tried to get a good one from Ebay and other sources, but I had no luck. So I ordered a leather cover, and had it installed on the truck. The truck's interior was red originally, but the previous owner had painted it black. Eventually that paint has faded and how the dashboard has a nice red-blackish color, so I ordered a black cover for the wheel. Now I need to repaint the horn button cover in black to match the rest of the wheel, which now looks and feels great. And of course, I need to do is to see how I will cover the spokes leather (or how to paint it black), to match the rest of the wheel.
April 2003
Transmission
Front driveshaft

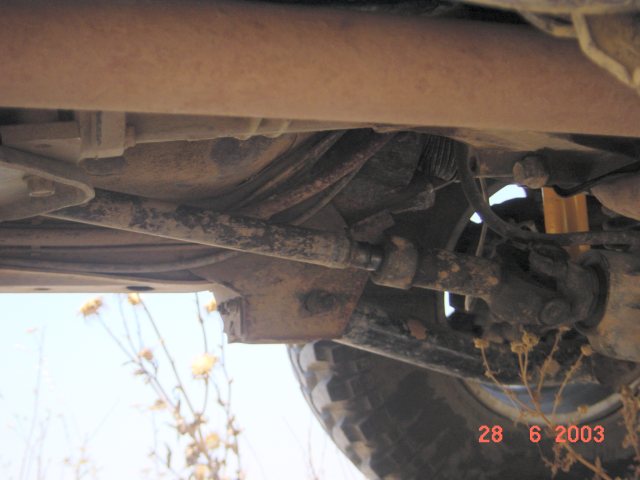
A problem was presented when I tried to tighten up the upper control arms, in order to gain more caster. The front driveshaft, started making wierd noises. Some investigation showed that this driveshaft was an old model, used only in the first two years of Cherokee's production. It was changed later on, with a new design, which has a double cardan joint, near the transfer case. Old Cherokees with this driveshaft are known to have problems with lifts, so a new driveshaft was needed. The only double cardan driveshaft we could find locally, was from an automatic XJ, and we were ready to have that cut (the autos have a longer driveshaft) and installed. The day I went to the shop to have it installed (an NP-231 transfer case front yoke is also needed), looking in the old parts bin of the shop, we found another driveshaft, which looked as if it could fit. We put it on the truck, and it was OK, the only problem being that there was very short compression travel available. I tried it for a couple of rounds in my new, favorite playground (the hill near my new house) and indeed it needs to be cut (look at the picture below).

Finally, I had the driveshaft shortened by 2 cm. The slip yoke is nicely centered, allowing 3.5 cm of compression travel and 4 cm of extension.
Steering
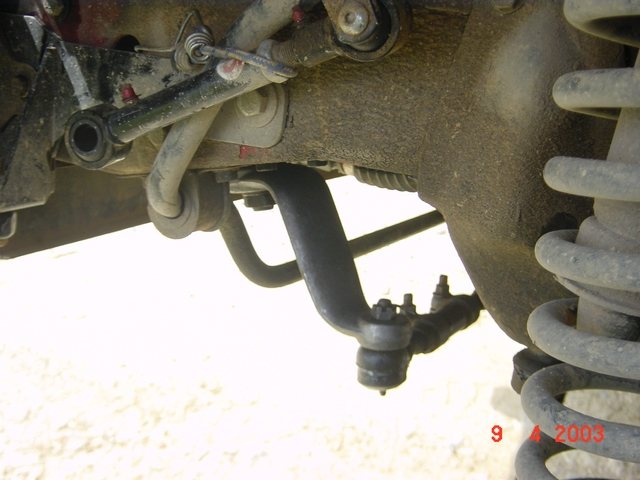
Skyjacker 2.5" drop pitman arm
In order to solve my steering problems, a new dropped pitman arm was installed. It is Skyjacker's model JA500, which provides 2.5" of drop, compared to the 1" drop ZJ pitman arm I was using. The new part is massive, heavy like a rock and very strong (see picture below). The steering feels much better now, but I will not express a definite opinion, until I have the front of the truck realigned.
Update on steering
My steering problem is finally solved. No it was not the pitman arm, it was not the tie rod ends. First, the steering got improved by maybe 80%, as soon as I replaced the stupid Rusty's track bar, with his heavy duty one, with the bushing end (and the appropriate frame mount). The TRE used in the standard arm was shot, so instead of replacing it with another, I opted to have the bushing end instead and that was a wise move. After that, there was still some uncertainty for the straight-ahead position, which could not be attributed to any of the TREs, ball joints or control arms. So, I had the steering box replaced and voila! Everything is back to normal. By the way, with Rusty's Heavy Duty track bar, the standard pitman arm, is the most appropriate, bringing the track bar and the drag link exactly parallel to each other. So, the above-mentioned Skyjacker one is for sale, if some one is interested, let me know. (pictures will follow).
Suspension
Front absorber mounts trimmed
During the last excursion to my new playground (i.e. the hill above our house), I noticed that the front lower control arms were limiting the downward travel of the front suspension, when they bottomed up on the shock absorber mounts. A little work with the cutting wheel and the lips behind the shock absorber mounts was removed, to gain some more articulation.
May 2003
Brakes
Handbrake cable relocation
Since I installed the lift, I was worried that the stock handbrake cables I had installed, were too short. Since I was also not satisfied from the flex of my rear axle, I decided it was about time to have something done about this issue. Doing some Internet search, there seems to be two solution to the problem. The first one uses longer YJ handbrake cables (the passenger one, you get two of these) and some modification at the rod, which comes down from the handbrake (you need to lengthen that rod). The second solution allows you to use your existing XJ handbrake cables. What you have to do, is to relocate the frame mounts of the cables, somewhere further back, and also to lengthen the handbrake rod. Since my cables were new (I had them replaced last October), I didn't want to invest in new ones, so I selected the second option.
With great help from the members of the NAXJA.ORG Forum, I got myself the required bits and pieces. Those included an angled piece of iron, some nuts and bolts, a threaded rod (8mm x 0.125), and a connecting nut. Overall cost less than 2 US$.
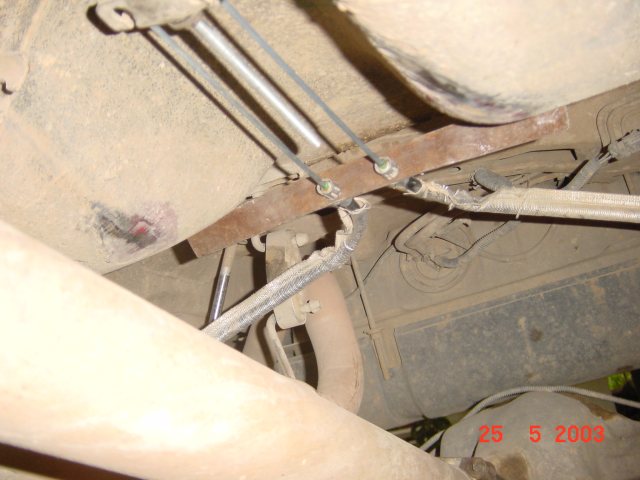
I started by removing the attachement bracket of the cables from the handbrake rod and then remove the cables from their frame mounts. Next, I found a good place to mount the angled piece of iron (see picture below). A couple of holes were drilled on the underside and two 1.4 cm holes were drilled in the center of the angled iron bar. Also two holes were drilled at the other end of the angled bar. I used two sets of nut/locking washer/washer/washer/locking washer/bolt to secure the angled piece of iron to the floor pan. The cables were passed through the two big holes, in the middle of the angled piece.
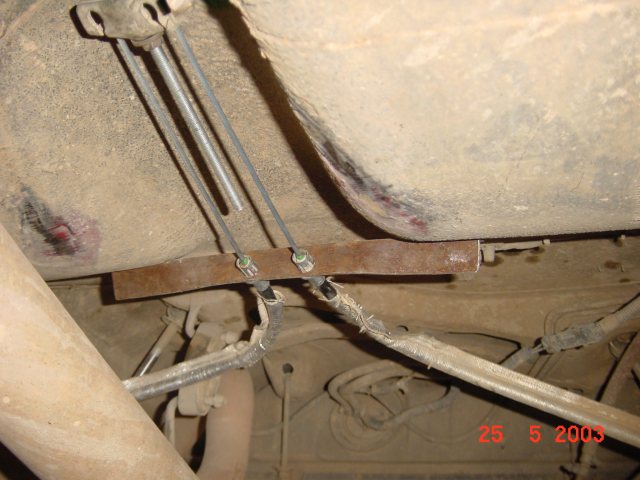
Then I used the connecting nut, to attach the threaded rod to the existing handbrake rod. I added a nut/locking washer in front and behind the connecting nut and tighten everything up together. I then re-attached the cables to the connecting bracket on the end of the threaded rod, as shown in the pictures. I reused the nut which was already on the handbrake rod, to secure the bracket on the new rod and added another nut behind it, so that the first one cannot get loose. Everything looked fine. I spend some time adjusting the handbrake and everything is OK.
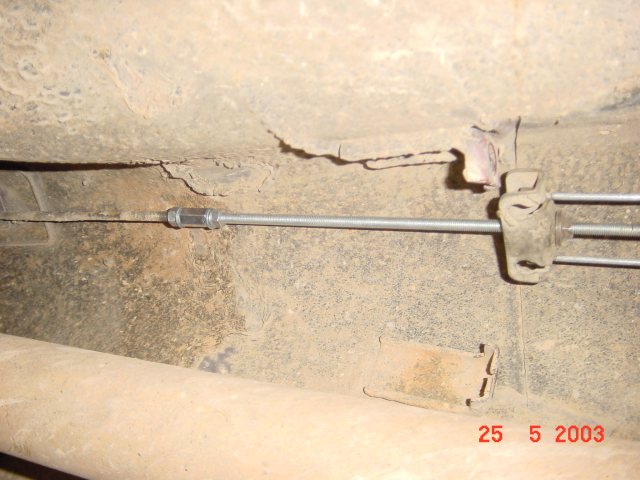
One remark, I still have to trim the adjusting rod a bit, since the way it is now, it takes a lot of effort to remove the adjusting nut.
June 2003
Suspension
Old Man EMU Shocks
Back in May, I noticed that the truck was a bit too loose for my liking, even on pavement, let alone off-road. I called Rusty and explained to him that the shocks are problematic. If you grab the shock near the area where the axle enters the shock body, you could move it sideways maybe 1-2 cm. Rusty insisted that this is normal with the hydraulic shocks. Normal or not, I didn't like it, so I ordered a set of Bilsteins from him. What a mistake! Rusty send the package with simple Air Mail, instead of US Parcel Service AirMail Express I've requested (the last method is insured and traceable). Guess what? The package never arrived to me. So around mid-June, I decided that I had enough with Rusty and his crap, and went along and ordered a set of Old Man EMU shocks (part numbers N35L and N36L) from a local shop, called "Tetrakinisi", which means 4WheelDrive in Greek. the shop owner is a very friendly guy, called also John, and he got the shocks for me, in less than a week.
I took the XJ for some off-roading yesterday (more will be done today) and the performance of these shocks is excellent, especially compared to the POS things I had on the truck until I got the Old Mans. The truck feels more solid now, and bumps are absorbed with much less effort. I think this is one of the best improvements I did. All that remains now, suspension-wise, is to get the Rubicon Express drop-down brackets and braces, to get a smoother ride.
September 2003
Suspension
Bilstein Shocks
The Old Man EMU shocks lost their effectiveness in less than two months after I had them installed. Probably because these models were too short for the lift I have. Stupid me, I had to order the ones for the Grand Cherokee, but I didn't know that at that time. Anyway, they were replaced by a set of Bilsteins, which seem to do an excellent job controlling the truck's suspension.
Rubicon Express Drop-Down brackets and braces
Well, yesterday (September 15th, 2003) I had the drop brackets and braces installed. I do not know how some people manage to do the installation in their front yard, it took me and my mechanic a full 4 hours to do it, in a fully equipped shop. We encountered several problems, the most important being that my XJ does not have the openings in the frame rails, through which you drill the original Upper Control Arm holes. So it was not possible to use the large bolts and nuts that RE supplies for that role. Instead, we used the OEM bolts to secure the upper bracket in its place. Not a very safe setup, but we plan to complete the procedure, as soon as the truck is properly aligned again. Of course the braces didn't fit any of the existing holes, since RE probably didn't take into account that there are still some XJs around wearing the T-5 gearbox and 207 transfer case. No big deal, we just drilled some new holes, at least this made the matting of the brackets and braces much easier (not that it was painless, just easier than what other people have exprerienced). Also, the installation of the drop brackets required another change in the front driveshaft length, so the driveshaft mentioned above, had to be re-lengthen again. Oh well!
Update on RE Drop Brackets (May 2004)
Well, the drop brackets are working OK and so far, not a problem from that bolt, mentioned above. The only issue I had, was that one of the bolts that holds the Upper Control Arms on the bracket, became loose, and had to be retighten, around April 2004.
March 2004
An abandoned Commanche gave me a lot of parts, which were used to do the upgrades below:
Interior
The whole dashboard (except the part which is around the instrument cluster and the radio and heater controls) was replaced with new parts. On my old truck, the glove compartment door and the long part at the bottom of the dashboard were broken in some areas. The parts from the abandoned Commanche were in excellent shape, so I used a special spray, to coat them all the dashboard parts with several layers of black color. My dashboard looks like new now.

The same was done with the central console, which is as if it just came from the factory. No broken parts any more. The upgrade of the dashboard and console parts removed the stupid reddish-blackish color that my dash had, as a result of some experiments of the previous owner.
The Commanche was from the years 1988-1990, so it had what is called a "Type 2" cluster. This cluster is fully compatible with the older one, that I had in my truck, plus it was in metric units (km, degrees Celcius etc.). The only problem was that since the Commanche was a 4.0 lt one, the tachometer was not working properly, it showed 2/3 of the actual RPMs. With the help of the guys from NAXJA, the tachometer was adjusted to work properly with my 4-cylinder engine.

Unfortunatelly, for some strange reason the fuel gauge ceased working, after the tachometer operation (I admit I removed the fuel gauge to check if the LED it has was working all right). Following several attempts to figure out the problem, the fuel gauge stopped working completely. Upon closer examination, I discovered that the thin wires which make the rotor of the fuel gauge have been broken. Nothing a thin soldering iron couldn't fix, and soon the fuel gauge was back in order.
One final mod I did in the inside of the truck, was to add a handle on the passenger's A-pilar. My truck had no handles at all, and some of my passengers had complained about this ommission. Well, it was taken care of.
Exterior
The donor Commanche allowed me to change the old grille of my truck, to the newer style. After all the parts were removed from the front of the truck, the newer bezels were installed (with some trimming) and then the newer grille.

The last mod for this time, was the installation of external, electrical mirrors. My passenger's side standard mirror broke, and the local DC asked for 200 Euros for a new (manual) one. Well, for 200 US$ (about 160 Euros), I got a set of two electrical ones, plus the mirror's switch, from Rancho Jeep Recyclers. The installation was relatively uneventful, I even managed to remove the old mirrors and install the new ones, without removing the door trim. An other electric luxury added, a very useful one. By the way, why on earth US authorities do not allow panoramic mirrors on the driver's side, is beyond my comprehension. The passenger side is just fine, the driver's one is a standard mirror! Go figure.
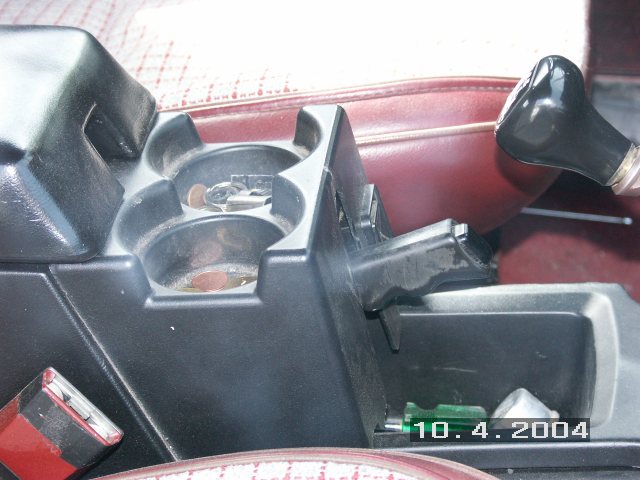
Above, you can see the power mirrors switch installed in the cap holder, in the console.
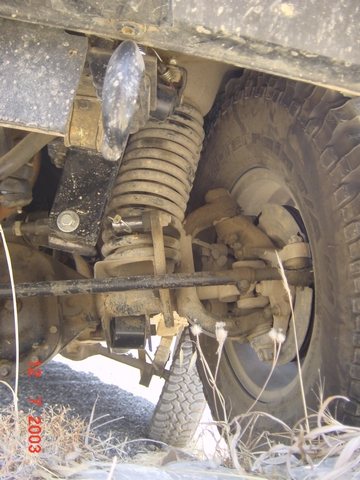
Suspension & Steering
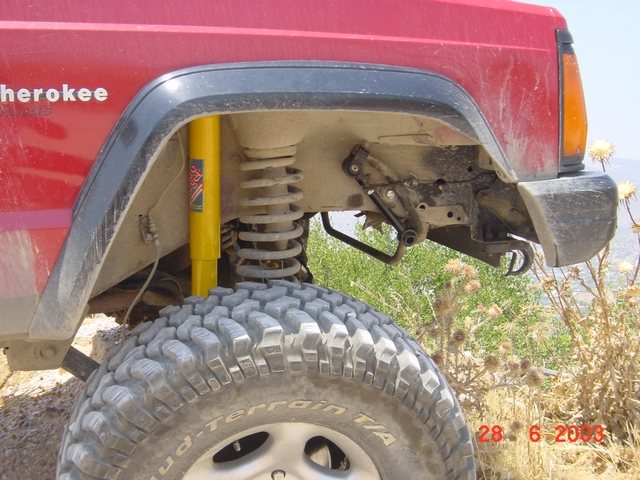
The following problems were identified during some off-roading a few days ago (July 2003):
1. With the passenger's wheel going up, the track bar binds at its axle mount.

I have to trim the mount a bit to allow for more travel.
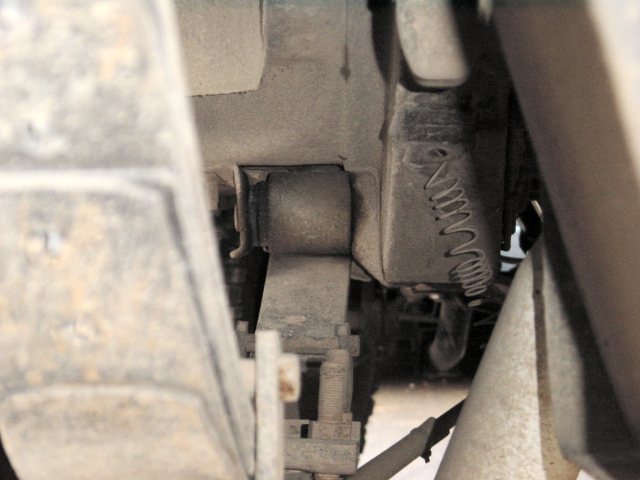
2. I need to install some longer bump stops at the front. Here you can see that the front spring is almost fully compressed.
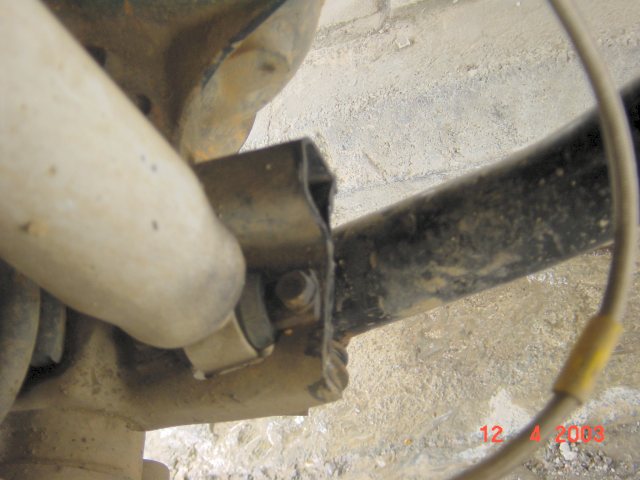
3. The second leaf in the rear springs has a curving edge at its rear end. When the suspension flexes, the leaves move laterally, thus the second leaf tends to move away from its normal position and that edge is binding with the shackle.

At that position, the shackle gets a groove which is not a good thing. I have to take the springs apart and trim that edge.
Skid protectors
Together with my lift, I had ordered a Hi-Lift jack, the only way to lift the truck now, at almost +6" of height. Rusty told me that I could use the rear hitch to lift the truck and also the front hooks. What he didn't explain though, was that I needed to do some work, in order to use either. You see, my rear hitch is not a hitch per se, in the sense that it does not have the square tube in which to instert the jack to lift the truck. I tried to use the bar on which the ball is screwed on, to lift the truck, and the truck almost fell off the jack. This can be easily fixed, by replacing that steel bar with a square tube. In the front though, there is no way that I can use the hooks to lift the truck from. What Rusty forgot to tell me, was that I need to weld some square tube there too, in which to fit the jack. Also, there is no way I can lift the truck from the sides, so a set of skid protectors are in order. I'll probably have them made locally, since the cost of bringing them over from USA, would be too high. Below, you can see a picture of the skid protectors I want, these being made by Tomken.

- Air Lockers :
Do I need to say more? If the car is lifted enough to install 33" tires, then obviously some differential gears will need to be changed, and this is the perfect time to install a couple of Air Lockers. So the next step after the lift, is to get some 4.56:1 gears and the lockers and have them installed on the truck.
- Protective equipment :
I guess, that due to the lift, there isn't much need for protective equipment underneath the truck. The diffs would certainly benefit from some protection, and I would like to put a rubber cover underneath the alternator, to protect it from splashed water, but at this moment, I can live without these. Some engine/transmission/transfer case protection would also be nice, but it will have to wait, until my bank account gets a few more zeros.
- Bushwacker flares :
I just love their looks!

 Return to the Jeep Cherokee Page