Checkering the front strap of a 1911
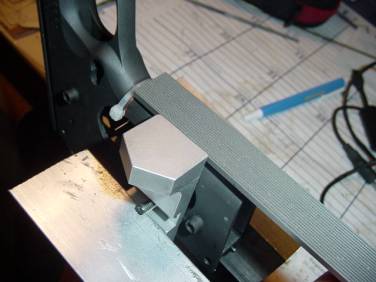
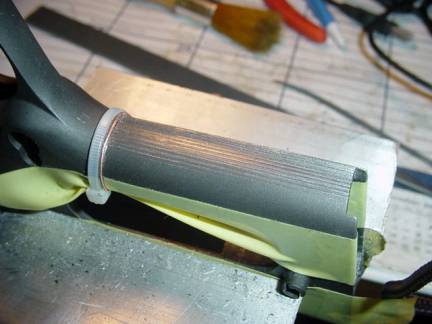
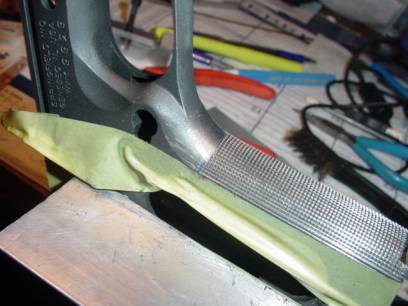
To start with, the frame has to be stripped down to nothing. I don’t bother to take off the plunger tube or grip bushings. Then I tie wrap the top of the strap as high as I can get it without it starting up the curve of the trigger guard. This will help me make the stop line for the checkering.
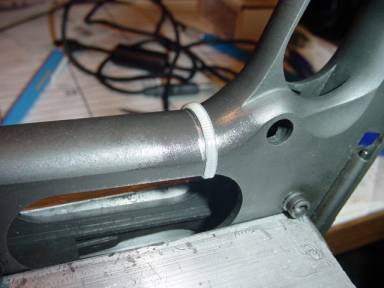
Using a 60-degree needle file, I make a small and straight line just below the tie wrap using the tie wrap as a guide for the file.
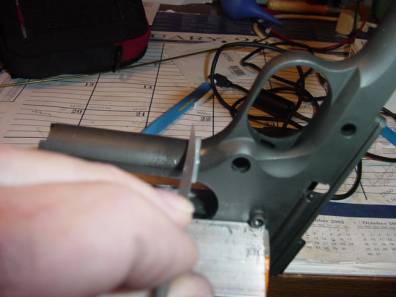
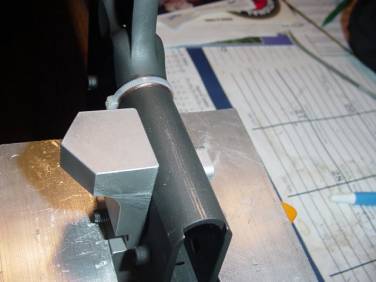
After the small cut is made for the stop line, I tie a 18 gauge solid copper wire into the groove to act as a “soft stop”. A forum member suggested this. Great suggestion!
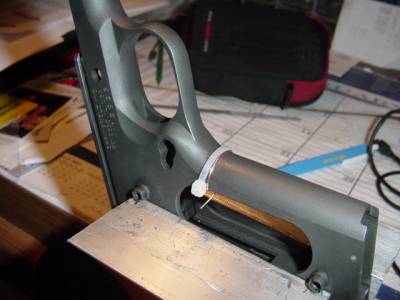
Here you can see the wire in the groove and snugged to the frame.
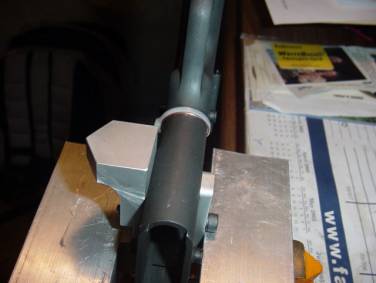
Then starts the process of cutting the verticals. I first fit the Brownell’s checkering guide backwards to the frame. This will act as a guide to cut the first verticals. I am using a 25 LPI file. Make SURE that the first cuts that you make are centered on the front strap. It just so happens that the Brownell’s guide and file that I am using allow this first stroke to have the lines centered on the front strap. They don’t have to be perfectly centered, just in the center of the strap to start and then working to the edges.The finer the checkering that you do, the less critical it is that the first cuts are perfectly centered. You should mark the sides of the file with a Sharpie as you will ALWAYS want to use the same side of the file for all of your work. This will keep the lines evenly spaced and consistent. MAKE SURE that the file you are using has the teeth lined up straight to the edge of the file. Tapered files will not and you cannot use a straight edge as a guide. I would not even suggest trying to use a file that does not have the teeth in the very straight line with the edge. It will also have a half row of teeth on the straight edge.
Start working the file with the edge against the stop of the guide. Use light pressure!
Make sure that you check to keep the file straight, flat and centered on the strap.
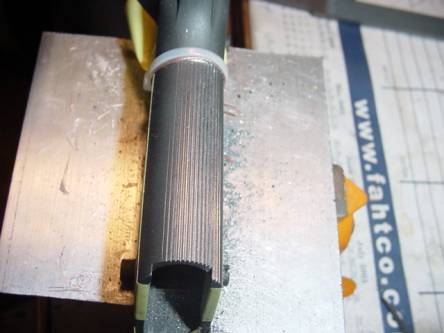
Here you can see the first light cuts. Just keep working the file against the stop. Keep cutting until you feel no more drag on the file as you push it into the cuts. You need to keep a thumb on the top of the file as you push it to cut to make sure that it stays registered into the cuts. This is the most critical step. These first cuts will be used to guide the rest of the cuts as you move across the front strap to register the file for the rest of the cuts.
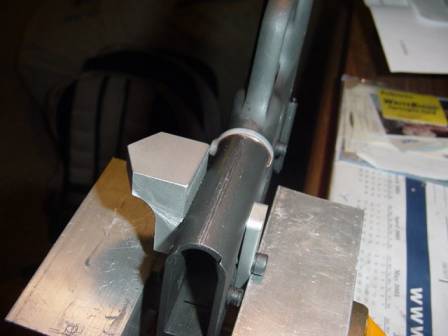
This last picture shows you how the initial cuts look and that they are straight.
Ok, here we have been working on the cuts for a while. I have masked the sides of the frame with electrical tape to keep them from getting damaged. Even though I am using aluminum on the jaws, the Parkerizing is easily scratched.
Just keep working the file from the center to the edges. You don’t have to push real hard to get it to cut. I also wear mechanics gloves when I do this. It sure saves wear and tear on your hands. Only work about an hour or two at a time. You will get tired and start to slip and slop if you don’t.
In this picture you can see that the center and the right side are done. Now we are working slowly to the right, using the previously cut lines to guide the rest of the cuts.
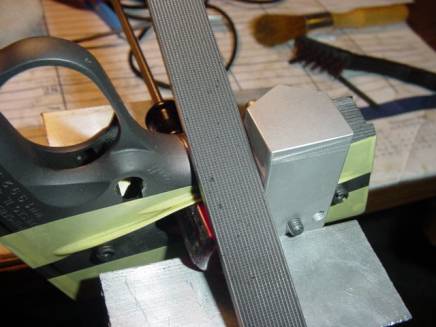

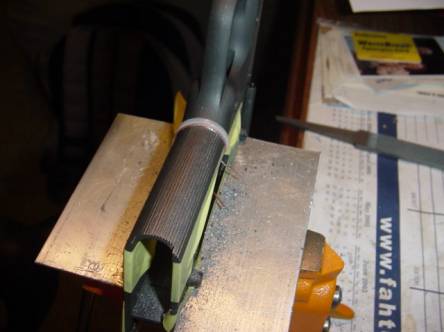
Ok, here you can see how I set up for the horizontal lines, now that the verticals have been finished. You don’t want to cut the verticals any farther than the curve of the front strap. This will be obvious. One of the ways to really screw up a nice checkering job is to over cut the sides. If you look, you will see that I have clamped the checkering guide onto the front strap with the triangle over the front. I will use the side of the guide to make the first horizontal cuts. You want to position the file so that the teeth of the left edge DO NOT go beyond the stop cut that you made when doing the verticals. You will also notice that I have removed the tie wrap and the copper wire from the stop cut. You can see the first indications of the horizontal lines in this pic. Cut lightly! To start with. You can see how straight they are from the onset. As you work the file over the strap, make sure that you keep the file horizontal to the surface that you are cutting. Imagine that you are laying a table knife level and flat on the top of a tennis ball and you will get what I mean.

Here you can see the horizontal lines really starting to develop. Again, just make sure that you start straight and everything will keep in line. Also, as you work the file over from side to side, maker very sure that you keep the file straight. The Brownell’s guide will allow you to keep the side of the file against the edge of the guide almost the whole way from side to side as you work the file over the strap.

Ok, here I have put on some cold blue. There is a good reason for this. It works like Dye-Kem. You can very easily see now what the checkering will look like. But, when you start to make the cuts it is very easy to get lost in the “glare” of the metal that you are cutting. The cold blue lets you see where you have been.

Here I have applied cold blue to the rest of the cut area. You can see that the checkering is shaping up nicely and this gives you some motivation to keep going! I am about 4 hours into it at this point. Don’t worry if all of the lines are not really perfect. This can be corrected to some extent when you are done with the file and start pointing the pyramids up with the needle file. Again, I use a 60-degree needle file for this. Really helps get the job done near the edges and trigger guars without gouging up the rest of the frame.
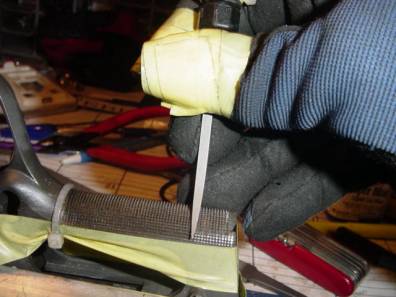
Now we start point the checkering with the needle file. You can see that I have gloves on and have added some “reinforcement” of tape to the thumb and finger. This is needed. You will see. Work from the center to the edges. Again, light pressure. You only want to cut with the needle file to the point that the resistance gets very light. You can tell how far to cut by the lack of resistance that you get after you have made the cuts. Go easy! A little goes a long way. Take a magnifying glass to the work that you have done often. You will be able to tell how far to cut as the points start shaping up. It does not take much at all, especially on the horizontals. The verticals will always be more work as they are longer and provide more resistance to the file.

Here the pointing of the diamonds is almost complete. When you do the edges, make sure that you go very slowly and carefully.
To finish up, you will have to decide what to do with the top edge and the sides. I always like to give my checkering a high relief or paneled cut at the top. I do this by taking the needle file and just take off the top row of checkering that is never just quite right anyway. That makes the area under the trigger guard looks as if the checkering is higher than the metal between it and the trigger guard. I like this look. To finish the edges on this gun, all I did was work the last cut of the checkering file with the needle file. By working the needle file into these last cuts, I was able to go just a bit deeper than form a border or edge for the checkering. Worked out well. Also, I would wait to point up the top row and edges rows until you have worked them over for a finished look. This will help you tell just how far to go with the pointing on the edges.
046"/>
Here I have started to take of the last row off cut right under the trigger guard. This is where the relief comes in. You can also see that I have started to work the area under the trigger guard to smooth and blend this area. I work it with files and then finish it with 400 grit sandpaper “belt” sanding the area with strips of sandpaper.
A very important tip for the pointing of the pyramids, cold blue the checkering area BEFORE you start the pointing. It will be very hard to tell what rows you have done and which ones you have not. Also, the grooves will start to look like the tops of the diamonds and you will get cross-eyed. By cold bluing it, you will be able to tell where you have cut and where you have not. It will also kill the glare and allow you to see the diamonds better. I re-blued this area about 4-5 times in the process of pointing it up.
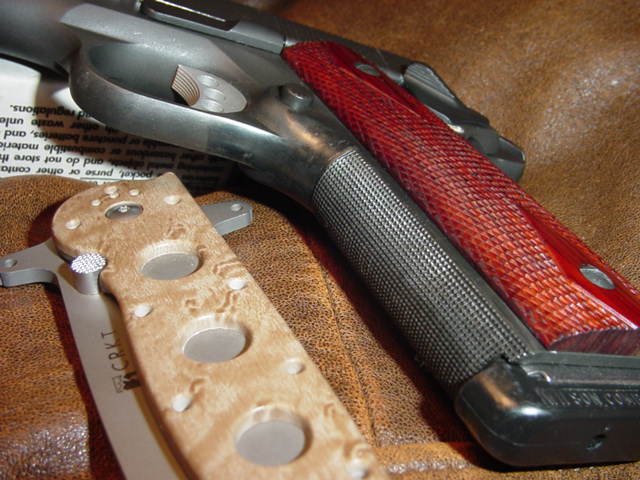
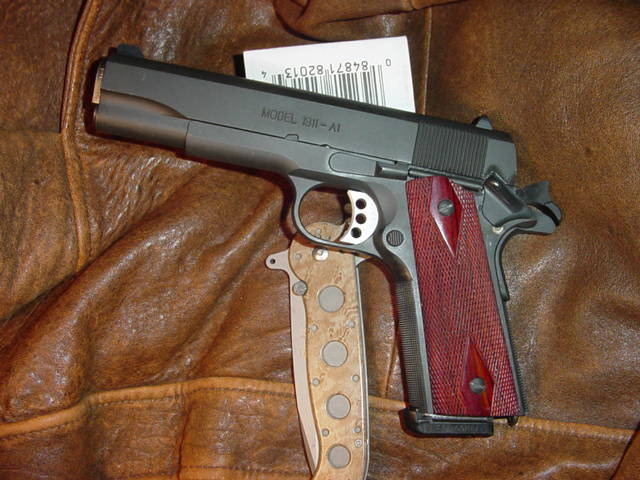
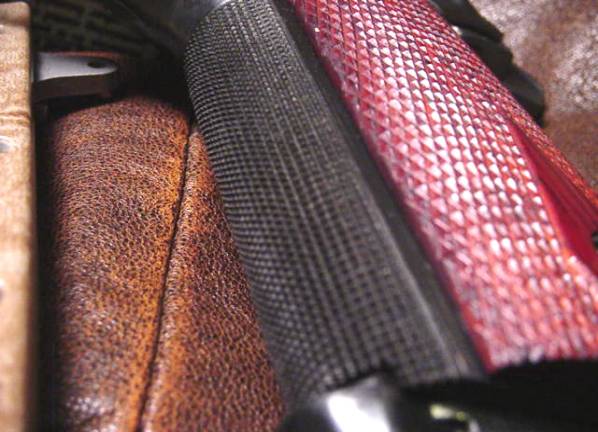
Here is the finished result. I still have some cleaning up to do. This is also just cold blued for the pics. I will need to get it media blasted and the lower re-parkerized.
I hope that this has been helpful. I am NOT a gunsmith or an expert. Just a poor guy that likes his 1911s checkered and was not afraid to take the time to learn how to do it myself.
Buy the file and guide, take a swig of courage and dive in! You won’t regret the learning experience and the results. Just go slow, take your time and don’t work when you are tired.
Jess
Jessmx5@earthlink.net aka Deezulsmoke. All contents are copy write 2005 of OnTarget, LLC. Can be saved for personal use and reference, or with the permission of web site author.